28

Insignia NS-PCY5BMA Bluetooth 4.0, Macintosh Yosemite 10.10.2, and Handoff

Posted on 19th May 2015
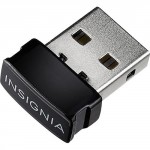
Insignia NS-PCY5BMAWith the release of Yosemite and iOS 8.1, came a new way to connect the many Apple devices that one person can have. This method known as Continuity and Handoff allows a phone call to be answered on a Macintosh computer and transferred to an iPhone along with access to continuing to edit an email from one device to another. These are just a couple of examples of Apple’s new feature set. See Apple’s explanation here.

The feature is designed to work only with newer model Macs and can leave some of us, including Hackintoshers, out of the mix. The requirements call for Bluetooth 4.0 and certain WiFi chipsets to natively enable the feature. Some work from the community has given us the “Continuity Activation Enabler” for older Macs and can even work for some Hackintoshes that have a Bluetooth 4.0 adaptor that is natively support Out of the Box in Yosemite. A cheap Bluetooth adaptor can be found in a lot of places online, but local availability of a solution can be limited.

Best Buy sells at least one Bluetooth 4.0 dongle under their in-house brand Insignia model NS-PCY5BMA. Luckily for us, it sports the Broadcom BCM20702A0 chipset which OS X Yosemite supports, but just not in the Insignia flavor. To enable Handoff, we must get a working Bluetooth 4.0 adaptor at the start. The Insignia one can be used after it is enabled in OS X. What we will look at today is how to get OS X to recognize this adaptor, and then activate the Handoff feature. This guide should work for any adaptor that has the BCM20702A0, but is not recognized under the Bluetooth section in the System Information window.

2

Fix iMessage on Yosemite

Posted on 17th March 2015

Apple-logoFirst off, Happy St. Patricks Day!

It has been a question that many Hackintoshers have been trying to solve since the release of the Yosemite betas last year. How do we get iMessages to work? Many have tried and many have failed. What has seemed to lack is a good comprehensive guide covering a wide range of scenarios.

This guide over at Tonymacx86 is a pretty detailed resources and should help you get your setup going. You are best to use the Clover Bootloader as is seems to handle the manual values as well as NVRAM much better then Chimera/Chameleon. I will note the chapter I followed for each setting in my setup.

Anytime I would try to sign in to Messages, I would get the “An error occurred during activation. Try again.” message. This was good news for me since I just had to make sure Clover had the right serial numbers and so on. Some situations will still require you to call in to Apple to have them whitelist your serial and some other values. For my situation, all I needed to make sure I had valid was:

  • Product Name (SMBIOS and found one matching my hardware using MacTracker) Chapter 4.2
  • Serial Number (Generating one in Clover Configurator and verifying at Apple Selfsolve) Chapter 4.1
  • SmUUID (Generating a random one using uuidgen in the terminal even to know my board did not exhibit the Sid bug) Chapter 5
  • ROM (Using MAC Address of my ethernet minus the colons) Chapter 7.1
  • MLB (Serial number that I generated plus 5 random alpha/numeric characters) Chapter 7.1

I also made sure that all of my configs for iMessage and iCloud were deleted prior to doing anything as to make sure I started as fresh as possible. (Chapter 3.3)

Note on the SmUUID. It is better to generate a unique SmUUID and not assume that your motherboards will work with Apple’s servers. Just run uuidgen from the terminal 4 or 5 times and use that value in Clover Configurator. Also make sure, as is detailed in chapter 3.2, that your ethernet and wifi are labeled as enX and showing as Built-In for this to work right.

Once all of these were set up with correct values, I did need to change my Apple ID password. Once reset, I was able to login and send/receive iMessages once again. Once you have correct values, you will want to always use these with your particular motherboard/cpu combination as to not blacklist that system in the future as long as Apple does not change their verification process again.

And finally, a big shout out to jaymonkey who has spent countless hours keeping his guide up to date. Without his collection of information, iMessages would not be functioning on Yosemite Hackintoshes.


0

iMessages now working in OSX

Posted on 10th March 2013

For those of us using Apple’s OSx on custom hardware (Hackintosh), iMessages has failed to connect in recent months. This is due to how iMessages verifies the hardware and sees that we are not running a true Apple device.

Chimera, the bootloader included in MultiBeast, has been updated to 2.0.1. In the 2.x release, they have added a fix that allows iMesaages to work on your home-brew OSx machine. This update is not currently a part of Multibeast, so it will require downloading and installing separately. Just follow the install wizard and make sure to install on your Hackintosh primary partition/drive. Any custom configurations should not be overwritten, but always make a backup just in case.

Download Chimera (Requires an account).