Hackintosh Mountain Lion Upgrade
Posted on 20th July 2012
As the impending release of OSX 10.8 Mountain Lion is near, it is also time to make sure that we are ready to install Apple’s new OS onto our custom Intel hardware. We will cover the in-place upgrade from OSX Lion 10.7.4 to the GM(Final) release of OSX Mountain Lion.
This procedure has been confirmed to work with the official release of Mountain Lion in the App Store.
A clean install of Mountain Lion will not be covered in this article, but you can refer to this site which will walk you through a clean install. A clean install is great if you want to start from scratch, but for the rest of us with a lot of data, read on.
Tonymacx86 has released Unibeast for Mountain Lion which can be used to perform a clean install.
Legal Notes
I am not responsible for the destruction of any hardware, software, or personal injury as a result of following this guide. This is a Try at your Own Risk project and is intended for educational purposes only. I am also not responsible for the downloading of illegally obtained software and leave the responsibility of any End User License Agreements (EULAs) on to the person(s) reading this article.
YOUR MILEAGE MAY VARY!
Requirements
If you have not already installed 10.7.x Lion onto your Hackintosh, then you can follow my guide for the Asus P8Z68-V/GEN3 or look for something specific to your system. Tonymacx86 is the best resource to get all of the applications needed to get a working Lion system. You will want to start with Unibeast. A updated version of Unibeast and MultiBeast may be expected some time soon after the official Mountain Lion release as the Tonymac projects are well maintained. The rest of this guide will assume Lion is installed and running well on your system.
UPDATE 7/25/2012: Unibeast and Multibeast have been updated to support Mountain Lion. Head over to this article on Tonymacx86’s site to download and install a clean version of Mountain Lion.
Here are the specs on my current Hackintosh:
- Asus P8Z68-V/GEN3
- Intel i5-2500k (Sandy Bridge) 3.4Ghz Quad-Core
- 16Gb Patriot CL9 PC-1333 DDR3 (4Gb Modules)
- XFX Radeon HD6770 1Gb DDR5
- Western Digital 340Gb Blue
- OCZ ModXStream-PRO500W Power Supply
- Corsair H50 Hydro Series CPU Water Cooler
- Antech One-Hundred Mid-Tower Case
- Plextor PX-B320SA Blu-Ray/Dvd-Writer
- Logitech Z-5 USB Speakers
- Logitech MX700 Wireless Keyboard/Mouse Combo
Checklist
You will need to make sure you have completed the following:
- Backup of the current system using Time Machine or SuperDuper to a spare drive just in case.
- A Real Macintosh Computer (The upgrade will not process otherwise). See here for supported Mountain Lion models.
- eEFIt boot manager installed on the Machintosh (Makes booting from the Hackintosh hard drive easier from a usb device).
- This zip file over at http://www.osx86.net. (You will need to created a logon to download from this site).
- Kext Utility.
- Chimera 1.11.0 (You need to be registered to download).
- Official Mountain Lion installer from the Apple Store or the Gold Master from the Apple Developer site.
- UPDATE 7/25/12: Multibeast from Tonymacx86 now supports Mountain Lion. This can be used in place of Chimera, Kext Utility, and the zip file from above.
NOTE: Mountain Lion removes support for 32-bit CPUs. You will need to make sure that you can run 64-bit software on your hardware.
Part 1 – Initial Installation
Once the above conditions are met, we can begin the install. The Mountain Lion installer can be downloaded in the Apple Store. Once the download has completed, make a backup of the application to a flash drive or DVD.
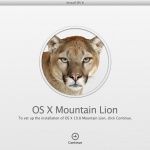
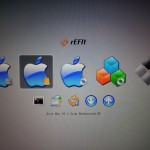
We now need to pull the hard drive from the Hackintosh and install it in a real Mackintosh. If you plan on using a usb adaptor, then make sure that rEFIt is installed on the primary drive of the Mackintosh. When you boot with the usb plugged in, you should be able to select the now external usb Hackintosh drive and boot back into the Hackintosh’s desktop. From there, you can run the Mountain Lion installer. If from the Apple Store, you will find the application in Applications or the Launch screen. If it is the Gold Master, you will mount the img and run the app from there.
The next fews screens are self explanatory. Click continue, agree to the terms, select the Hackintosh’s drive, enter the Administrator credentials, and then wait for it to install and ask for a reboot.
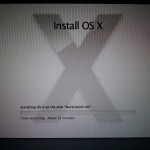
The installer will now want to restart the system. Allow it to and watch and wait as it bootstraps and installs the system in place of the old. There was no need to select the drive in rEFIt. It will boot directly in after a restart in a direct drive install if you opted for that over the usb adaptor.
NOTE: I did this with a usb adaptor, and when it restarted, the MacBook Pro locked up. I had to hold the power button for about 5 seconds to power down, and then powered back up. The installer resumed without any other interaction from me. Do not be alarmed if it locks up during other reboots.
The system will install and then reboot one last time. Be patient as the install time can vary on the speed of the Machintosh. The system should boot right back into the OS. If not, you may need to select it again in rEFIt. You may be presented with a Apple ID screen if you had not already linked it in the previous Lion install, otherwise, you should be presented with the Desktop.
Part 2 – Required Changes
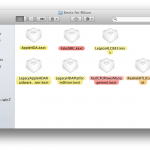
Once you are back to the desktop, everything should look as it did before, but when you go to the About this Mac, it should show 10.8. Now, we must install 2 required kexts and a new boot loader so that we can boot the drive back on the Hackintosh. Download Kext Utility and the zip file from http://www.osx86.net. You will need to copy the kexts FakeSMC.kext and NullCPUPowerManagement.kext from the “Kexts_and_EFI_for_MLion/Kexts for MLion” folder to your Hackintosh hard drive’s /System/Library/Extensions and then run Kext Utility.
NOTE: All other kexts are optional depending on your current hardware setup. You may need to wait for MultiBeast or the individual kexts to be released for Mountain Lion.
Now we need to update the boot loader to a version that supports Mountain Lion. We will use Chimera 1.11.0 from TonyMacx86 as it already has support for Mountain Lion. Chimera sports an install utility, so run that and make sure that it is pointed to the Hackintosh’s hard drive.
Once the Chimera installer has completed, you can remove the Hackintosh drive from the Mackintosh and re-install it in the system. Power up and wait to see if your system comes back to life.
UPDATE 7/25/12: Multibeast can be used to install Chimera and the two required kexts. I recommend to only install the 3 the first time and add one each reboot for any additional hardware you may need support for. This way you know what Kext caused a kernel panic of you get one.
Final Notes
Once the shiny new Mountain Lion desktop appears, you have completed the upgrade. From this point, you can install any additional kexts that you might need to make other hardware work. On my setup, I do not have an updated AppleHDA.kext for my on-board ALC899 and I have not seen an updated speedstepper.kext. Hopefully, in a few weeks after the final release of Mountain Lion, we will see other updated kexts.
If for whatever reason the install failed, you can recover using a fresh install and then importing in from Time Machine, or you could use SuperDuper to re-image the drive with your original 10.7.x install.


Thank you so much for getting something out there. I was wondering what the upgrade might look like.
Will this guide work for the App Store release from today?
I am currently downloading the Offical Build from the App Store and will test this install procedure today. Stay tuned for an update on this post.
I have tested the above procedure on the App Store release from today. It is working.
If I have another installation of OSX on my hackintosh on a separate harddrive, would it be possible to boot into this instead of using another MAC and procedure with your steps? I am asking as I don’t have one supporting mountain Lion, just a MB from 2008
No because the ML installer requires the specific EFI boot procedure of a Mac. You could do a Time Machine backup to the spare drive and then install a fresh clean copy of ML and then do a Time Machine restore.