Intel i5 “Sandy Bridge” OSX Lion Install on Asus P8Z68-V/GEN3
Posted on 21st January 2012
I came to a point where I felt that my simple Intel e2200 Hackintosh system was in need of an upgrade. I had been wanting to look into building either an i5 or i7 Sandy Bridge system. When a local retailer decided to put the i5-2600k and i7-2600k on sale, I could not resist the temptation and found myself researching for the perfect motherboard.
Here, I will outline the software build from start to finish, and show how easy it is to build a i5 Sandy Bridge Hackintosh with OSx Lion.
UPDATE: 5/24/2012
It has been 4 months since this article was created. The current Combo update is 10.7.4, and some of the referenced optional script/kext installs are not applicable. Please make sure that if you are doing a Combo update from 10.7.2 or doing a clean install, that you look for any updated information on any of the additional scripts (Speed Stepper Lion, Audio with headphone detection). For the most part, you can still have a great working machine by installing all kexts from the Multibeast package that I flagged as optional.
Legal Notes
I am not responsible for the destruction of any hardware, software, or personal injury as a result of following this guide. This is a Try at your Own Risk project and is intended for educational purposes only. I am also not responsible for the downloading of illegally obtained software and leave the responsibility of any End User License Agreements (EULAs) on to the person(s) reading this article.
Now with all of the legal stuff out of the way, on to the build!
Requirements: Hardware and Software
Parts List:
- Asus P8Z68-V/GEN3
- Intel i5-2500k (Sandy Bridge) 3.4Ghz Quad-Core
- 16Gb Patriot CL9 PC-1333 DDR3 (4Gb Modules)
- XFX Radeon HD6770 1Gb DDR5 (Flashed to show as a 5770 until Lion or Mountain Lion adds it. Look here for flashing.)
- Western Digital 340Gb Blue
- OCZ ModXStream-PRO500W Power Supply
- Corsair H50 Hydro Series CPU Water Cooler
- Antech One-Hundred Mid-Tower Case
- Plextor PX-B320SA Blu-Ray/Dvd-Writer
- Logitech Z-5 USB Speakers
- Logitech MX700 Wireless Keyboard/Mouse Combo
Software List:
- Legal copy of OSx Lion (Apple Store USB or App Store download)
- Unibeast
- Another Hackintosh or Apple Computer (To create the Unibeast drive and/or download Lion from the App Store)
- Windows desktop (Optional for Radeon flashing)
- Blank 8Gb Flash Drive (Used for the Unibeast drive)
- Multibeast 4.2.1
- Kext Utility
- Kext Beast
- Speed Stepper Lion (optional for native speed step)
- Athreros Bluetooth Firmware (optional for on-board bluetooth, however I was unable to get devices to work after pairing)
- Updated AppleHDA (optional for on-board audio)
- DSDT Editor or DSDTSE (required for the updated AppleHDA to work)
Step 1: Installation of Lion
Once you have a fully assembled tower, it is time to get down to the fun part. You will need to create a bootable UniBeast flash drive and can follow the directions in steps 1 and 2 here . Once the UniBeast flash drive is created, we can move onto Bios settings. You could follow steps 3 and 4 and potentially get a working system, but I will cover a few more specifics for the Asus P8Z68-V/GEN3.
Bios Settings:
We first need to make sure that a critical EUFI Bios setting is set prior to booting into our Unibeast created Lion installer. Make sure that SATA is running in ACHI mode. Do not put it into IDE or RAID as OSX will not see the drive connected.
Running the Lion Installer:
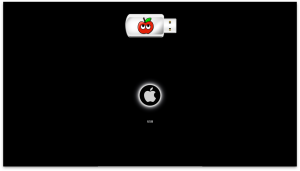
Once we have set one Bios setting, it is now time to install Lion onto our system. Reboot the system and hit the del key to enter the simple EUFI screen and then press F8 to select a boot device. Select your new Unibeast USB drive. You should be presented with the Unibeast boot screen.
In most cases, you can hit enter to start the installer, but if you have any other OSes installed in your system, you may need to select the installer first. I recommend that you disconnect all hard drives except for the one that you will install Lion onto. I will not be covering dual booting in this article. You can refer to Tonymacx86’s article/video here for dual booting goodness.
Step 2: The Moment of Truth
Now the the installer has finished installing all of the required files, it is time to boot into the fresh Lion install. The installer should automatically restart the computer, but you can go ahead and manually restart. When the Bios posts, make sure to hit del and then F8 again and select the USB install drive again. This time, select the name of the partition that you installed Lion to and hit enter. I did not need any startup flags here either.
If everything works, you should now be at the <what is this page called?>. This section should be filled out how you would like and I will not cover it in great detail. The only suggestion here is that I recommend that you do not register with Apple as I believe this is more for their hardware warranty. I also did not import data and settings from my old Hackintosh.
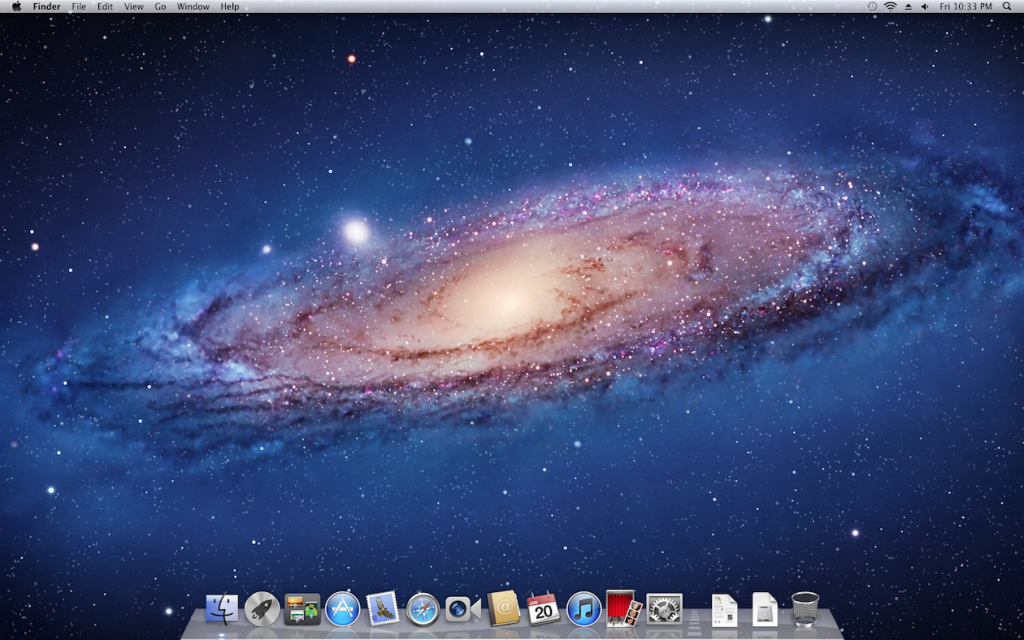
Once the forms have been completed, you should now be at the desktop.
Step 3: The Beast Within Us
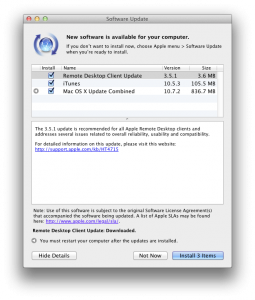
To make things easier when making changes to get the rest of the P8Z68-V/GEN3’s features working, we should go ahead and install any system updates. At the time of this article, the 10.7.2 Combo should be installed as there are changes that we will need to make that would otherwise be removed.
NOTE: Anytime we run a new combo update, we will need to re-run the following items from this point on in order to ensure that our system reboots. It may be required to make sure that you have updated copies of the programs and scripts that are about to be used to ensure that they are compatible with the current combo update being installed.
When the updates finish, you will be asked to reboot. You can reboot the system at this point, but again using the Lion install usb as the boot device and then selecting your new Lion install. Once booted back in and if you have not already, go get Multibeast. I used version 4.2.1 in this guide. We are going to select the options required to allow the system to be bootable. The following items need checked:
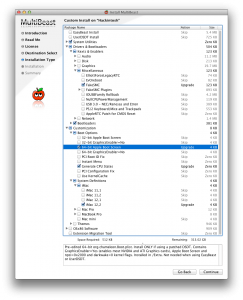
Required MultiBeast Options
- System Utilities (Repairs permissions and rebuilds kext cache)
- FakeSMC (Absolutely Required)
- Bootloaders (Installs Chimera so that the partition is bootable)
- 64-bit Apple Boot Screen (Runs the OS in 64-bit)
- Generate CPU States
- iMac 12,2 (This is the closest real mac model to a Sandy Bridge iMac)
- nullcpupowermanagment (Optional: See next sub section)
See the Screenshot for a visual list in the application.
Optional Script:
If you chose not to install the <nullcpupowermanagment> next in multi beast, then you must apply a patch that will keep AppleIntelCpuPowerManagment? from giving a kernel panic. I chose this option because it gets me as close to using vanilla code as possible. Hopefully a DSDT edit can be found to resolve this issue, but for now, Asus boards do have this issue and this script needs ran.
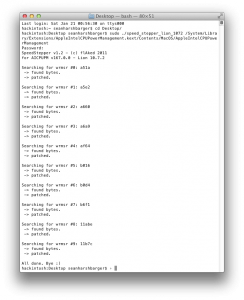
After Multibeast finishes, we need to run the Speed Stepper Lion script that will patch /System/Library/Exensions/AppleIntelCPUPowerManagement.kext to allow Speed Step to work properly on the Sandy Bridge and Asus P8Z68-V/GEN3 board. You must make sure that you download the proper script for your Lion version. At this time, there is only one for the GM (Gold Master 10.7.0 and 10.7.1) and the current 10.7.2. Since we already updated to 10.7.2 earlier, we will need to download speed_stepper_lion_1072.zip. Extract the script to your desktop.
NOTE: You will probably require a new patch every time there is a combo update. This setup was 10.7.2 at the time.
Open a Terminal and enter in the following code:
$ cd Desktop

$ sudo ./speed_stepper_lion_1072 /System/Library/Extensions/AppleIntelCPUPowerManagement.kext/Contents/MacOS/AppleIntelCPUPowerManagement
Once the script is completed, download and then run Kext Utility.
Now another moment of truth, reboot the system to make sure that it is able to boot off of the new hard drive. It is also safe to remove your Lion install usb at this time.
Step 4: Additions to the Team
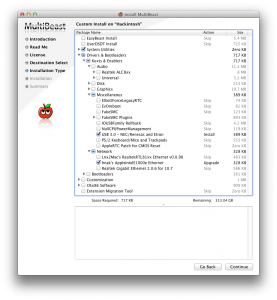
Now that we have verified that the system is bootable on it’s own, we can install some additional kexts from MultiBeast that enables USB 3.0, Intel’s Ethernet, and the optional Audio.
Additional MultiBeast Options
- System Utilities (Needs ran again to get these kexts to work)
- USB 3.0 – NEC/Renesas and Etron (USB 3.0 support, not hot pluggable)
- hnak’s AppleIntelE1000e Ethernet (For onboard ethernet)
I am not currently running these kexts, but I have tested and verified that these work. I am using a custom built AirPort card for wireless, and I do not currently have any USB 3.0 devices. The current USB 3.0 next will not allow you to hot swap devices, and it will kernel panic if you use anything other then a flash drive or hard drive. I am hoping that there will be a much more graceful solution in the near future.
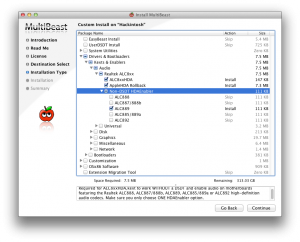
You can also install Audio from here using the following settings, but I will be covering a more in-depth audio install that gives us better input/output support for this board’s ALC889 chipset. If you plan to skip DSDT edits, you may, but all three options must be selected to make audio work.
Highly Optional MultiBest Audio Options
- ALC8xxHDA
- AppleHDA Rollback
- ALC889 (Required only if you are not using a custom DSDT file.)
The DSDT edits we will do in the next step will allow you to not use the ALC889 kext, but if you plan to do the edits, then I would install the updated AppleHDA from the next section.
Step 5: Code Diving for DSDT Edits (Audio)
To get audio to work, a few DSDT edits need to be done prior to installing any additional audio kexts. It is best to extract the DSDT from your own machine because it will give you the best compatibility with OSX and the hardware. There may also be other DSDT edits that you find elsewhere that may help control/detect other features on other add-in cards that you may have.
For On-Board Audio
 Device (HDEF)

{

Name (_ADR, 0x001B0000)

Method (_DSM, 4, NotSerialized)

{

Store (Package (0x04)

{

"layout-id",

Buffer (0x04)

{

0x7C, 0x03, 0x00, 0x00

},

"PinConfigurations",

Buffer (Zero) {}

}, Local0)

DTGP (Arg0, Arg1, Arg2, Arg3, RefOf (Local0))

Return (Local0)

}

}
For HDMI Audio (The Radeon Card Only)
 Device (GFX0)

{

Name (_ADR, Zero)

Method (_DSM, 4, NotSerialized)

{

Store (Package (0x02)

{

"hda-gfx",

Buffer (0x0A)

{

"onboard-1"

}

}, Local0)

DTGP (Arg0, Arg1, Arg2, Arg3, RefOf (Local0))

Return (Local0)

}

}
Device (HDAU)

{

Name (_ADR, One)

Method (_DSM, 4, NotSerialized)

{

Store (Package (0x02)

{

"hda-gfx",

Buffer (0x0A)

{

"onboard-1"

}

}, Local0)

DTGP (Arg0, Arg1, Arg2, Arg3, RefOf (Local0))

Return (Local0)

}

}

}
Once we have these DSDT edits in, it is time to install the updated AppleHDA kext from here. Extract and place the AppleHDA.kext to your desktop. Run KextBeast to install. Then run next Utility to clean up and reboot. On board audio should be working including headphone detection.
Step 6: Bluetooth (Optional)
The last piece of the puzzle is bluetooth, but because I could not get this to work 100% of the time with the on-board module, I will send you to this forum thread over at Tonymacx86. Be aware that there are reports of the Magic Mouse not working very well with gestures. I was unable to get any bluetooth devices to work after pairing.
It seems that the best bluetooth option still is to use an external usb dongle. Some have mentioned one made by Rocketfish with could be found at Best Buy or online somewhere. I happen to have a generic one that I purchased years ago that works out of the box
Final Notes: This is Only the Begining
I have a fully functional system running Lion. There are still some items that are flaky, like USB 3.0 and bluetooth, but overall, my system performs fairly close to the real iMac i5 we have here. The project was fun and fulfilling and helped shape a better grasp of how Mac OS interacts with hardware. I currently am only running Lion with Parallels installed so that I can access any windows apps that I might need.
There will also be some growing pains as new combo updates are released, and it is suggested that you do not run the updates until you have made sure that any edits will not be erased and needed to be re-applied. In most cases, everything, especially Multibeast, will need to be ran prior to rebooting when the combo update is applied. Outside of that, most of the other updates like iTunes can be installed with minimal risk, but as with all things, your milage may very, so always have a backup or backup plan just in case.
Will this guide cover 10.7.3?
It should up to the point that you use Multibeast to install the required drivers. You will need to run that before the system restarts after installing 10.7.3. Most of the custom drivers may require a updated package.
I have P8Z68-V LE. Will be the same process?
There may be some differences, but that board uses the same z68 chipset. Audio and ethernet may be different then this board.
Hey, I have the same board and I’m having problems with the Audio and Bluetooth. Can you post your files again as the links you’ve provided are not working?
I’d really appreciate it. Thanks.
If you are working on getting it working for Lion, you will want to use Multibeast from TonyMac for Audio as the kexts he includes work well.
As to bluetooth, the on-board was absolute garbage in OS X and was retired in favor of a USB 4.0 for Yosemite compatability.
Well I can’t use Multicast since I am using Clover as my Bootloader and I’m on Yosemite. But you might be right about the 4.0 part.
There is an edit for Clover plus a patcher that enables audio on the Realtek chips that should work on this board. Currently I am only using Clover on a Gigabit GA-Z87X-UDH3 which has a similar audio chipset to the Asus in this example. I was in the process of writing a guide for the Gigabyte board using Clover and Yosemite. If I remember, I can see about finding the Audio information and posting it.
It’s working now. I’ve found the correct kexts.
Since I’m moving on step by step I’m having problems with configuring iCloud now. At first I was able to log in to the App Store and iMessage but as soon as I followed a guide from rampagedev.com nothing works anymore. Hope to get that fixed too