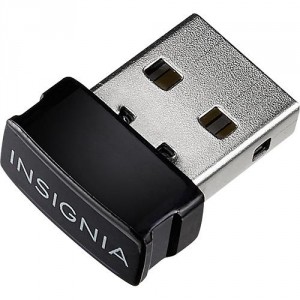
 OSX El Captain has been full release now for a handful of months and has even had a few updates since it’s release. Current version is now at 10.11.2. As we have seen with past OSX upgrades and the Insignia NS-PCY5BMA Bluetooth 4.0, edits have to be done in order for the system to recogize the bluetooth dongle. However, changes in 10.11 have also brought a slight change to the patch needed in order to get functionality restored for the dongle.
This guide will only cover what is needed to get the dongle recognized by El Capitan. For more indepth information on how to get this to work in Yosemite with Handoff, please look at my previous article: http://www.dersoldat.org/?p=1286
Edit Kext to Recognize the Dongle
To get the builtin Kext for the Broadcom BCM20702A0 to recognize the Insignia dongle, we need to add the devices Product and Vendor ID to the kext file. The kext that we need to modify is /System/Library/Extensions/IOBluetoothFamily.kext. Make a copy of it and place it on the Desktop. Once it is copied, right click on it and select “Show Package Contents” to reveal the folder “Contents”. Open the “Contents” folder and then the “Plugins” folder. In there you will see another Kext called “BroadcomBluetoothHostControllerUSBTransport.kext”. Right click on that and select “Show Package Contents” and then navigate to “Contents”.
You should now see the “Info.plist” which is where we will make our edits. Open this with TextEdit (You may need to right click and select Other to pick TextEdit) and add the following code:
<key>PID 569 0x0239 VID 6655 0x19FF</key>

<dict>

<key>CFBundleIdentifier</key>

<string>com.apple.iokit.BroadcomBluetoothHostControllerUSBTransport</string>

<key>Dongles</key>

<dict>

<key>Best Buy</key>

<string>NP4.0</string>

<key>Insignia</key>

<string>BT V4.0</string>

</dict>

<key>IOClass</key>

<string>BroadcomBluetoothHostControllerUSBTransport</string>

<key>IOProviderClass</key>

<string>IOUSBHostDevice</string>

<key>idProduct</key>

<integer>569</integer>

<key>idVendor</key>

<integer>6655</integer>

</dict>
This will work for the Insignia model that we have here, but the same edit should work for most that use the same chipset. You just need to find the Product ID and Vendor ID and convert it from Hex to Integer. In our example the Product ID in hex is 0x0239.

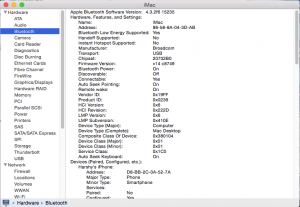
Bluetooth should now show the adaptor and it’s settings.
To convert it to an integer, go to this converter and input the Product ID minus the 0x. 0239 should come out as 569. Do the same for the Vendor id which 19ff becomes 6655 (again, omitting the 0x at the beginning).
Once you have the proper IDs in the Info.plist file, you can save it then close all windows. Now, you will need to use a Kext installer to replace the original IOBluetoohFamily.kext that still exists in your /System/Library/Extensions folder.
If the edits are correct, you should be able to reboot the computer and see the Device in the System Information window under Bluetooth.
A huge thanks to Guito Mendez, as he reported back to me about the edit that shows that IOUSBHostDevice has changed in El Capitan.
Handoff Activation
In Yosemite, I was able to to use CAT (Continuity Activation Tool) to allow older and non-support WiFi and Bluetooth cards to support Apple’s handoff. Unfortunately, the current Git version with experimental El Capitan support causes a kernel panic with my system. If you plan to try to use CAT (AT YOUR OWN RISK), then you need to at least make sure that you have a backup of IO80211Family.kext and a suitable way to boot into a recovery enviornment to remove the bad kext.
NOTE: You need to disable Apple’s SIP for you to be able to do a lot of these direct edits with the kexts. Look for documentaiton around that for Clover here at some point, but it is documented in other places already.
If a activation for El Capitan becomes available, I will post accordingly.
 I have not spent much time in the consumer end of the technology market in the last few years due to my enterprise role I currently have, but did manage to follow the developments leading to the release of Apple’s new products yesterday.
